Our Strategies for Toss Up
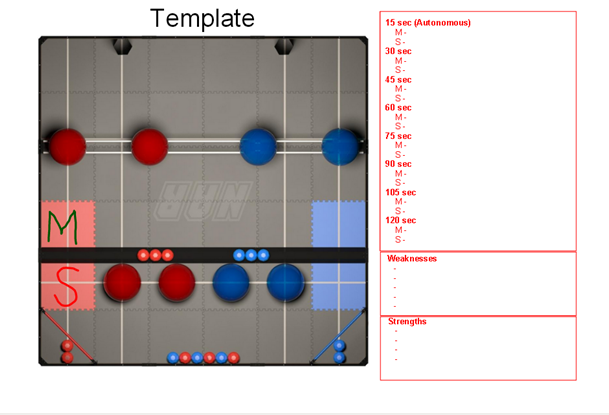
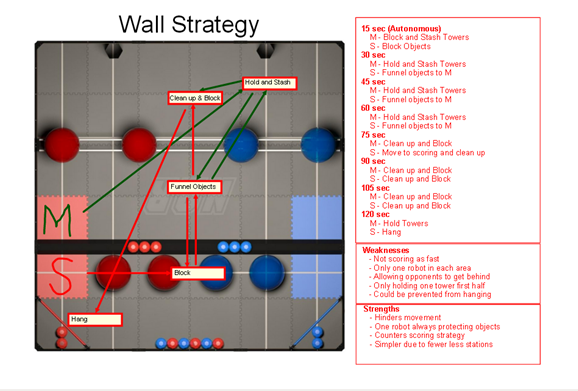
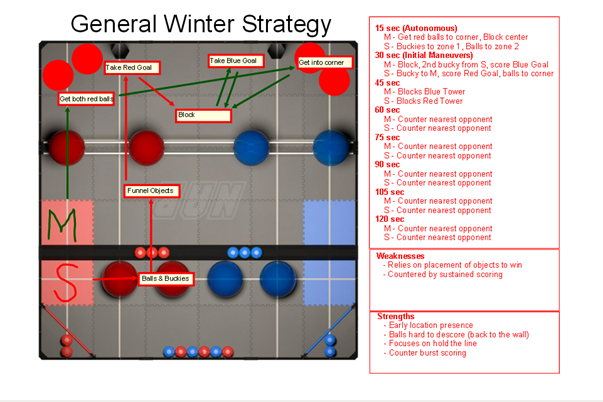
We start with a template of the field and create the fastest way to get the maximum score. Theoretically the max score will never be achieved against viable opponents so we cannot stop there. We map out what each robot could be doing every fifteen seconds of the match in order to calculate abilities later on. We also diagram each strategies strengths and weaknesses. The weaknesses are used to create the counter of each, so that we understand not only what to use against teams, but also what they could run against us. The strategies below are countered by the one below it. For those interested in the implementation of these strategies; match three of the 2014 US Open finals we applied the general winter strategy to counter a blitzkrieg spinoff run by 9090C and 5003 found here: https://www.youtube.com/watch?v=AILtva-F4Zg

Required Robot Abilities
After creating and countering as many strategies as we wanted The next step was to calculate the percentages in which a robot is doing a task and determine what is required to accomplish those tasks. From there we could determine what is most important for our robot to accomplish, where we would like to start, what we could do from each starting position, and what our robot needed to be able to do to execute our strategies. Finally we created and searched for design solutions that could accomplished these abilities and distributed the motors to the systems based on what was most important according to our strategies.
|
Efficient Scoring Strategy
M Has to... ▪ Block – 40 % ▪ Hang – 20 % or 10% ▪ Score – 20 % ▪ Collect – 20 % Needs to Be Able to... ▪ Get Under - Yes ▪ Go Over Bump - Yes ▪ Stash in Towers - Yes S Has to... ▪ Block – 40 % ▪ Hang – 10 % or 0% ▪ Score – 30 % ▪ Collect – 20 % Needs to Be Able to... ▪ Get Under - Yes ▪ Go Over Bump - Yes ▪ Stash in Towers – Yes Wall Strategy M Has to... ▪ Block – 62 % ▪ Hang – 0 % ▪ Score – 38 % ▪ Collect – 0 % Needs to Be Able to... ▪ Get Under - Yes ▪ Go Over Bump - No ▪ Stash in Towers - Yes S Has to... ▪ Block – 30 % ▪ Hang – 10 % ▪ Score – 20 % ▪ Collect – 40 % Needs to Be Able to... ▪ Get Under - Yes ▪ Go Over Bump - Yes ▪ Stash in Towers – Yes |
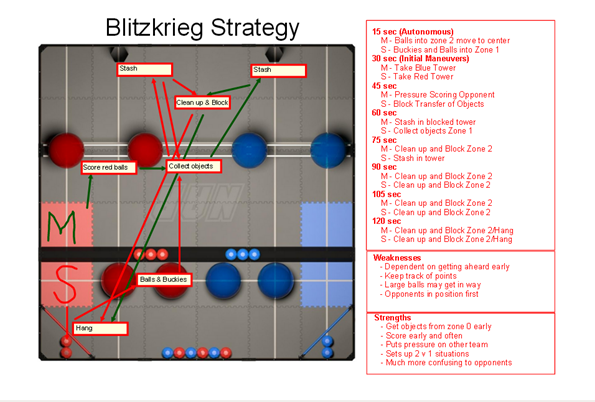
Blitzkrieg
M Has to... ▪ Block – 57% ▪ Hang – 7 % ▪ Score – 29 % ▪ Collect – 7 % Needs to Be Able to... ▪ Get Under - Yes ▪ Go Over Bump - Yes ▪ Stash in Towers - Yes S Has to... ▪ Block – 40 % ▪ Hang – 10 % ▪ Score – 20 % ▪ Collect – 30 % Needs to Be Able to... ▪ Get Under - Yes ▪ Go Over Bump - Yes ▪ Stash in Towers – Yes General Winter Strategy M Has to... ▪ Block – 87 % ▪ Hang – 0 % ▪ Score – 13 % ▪ Collect – 0 % Needs to Be Able to... ▪ Get Under - Yes ▪ Go Over Bump - No ▪ Stash in Towers - Yes S Has to... ▪ Block – 62 % ▪ Hang – 0 % ▪ Score – 13 % ▪ Collect – 25 % Needs to Be Able to... ▪ Get Under - Yes ▪ Go Over Bump - Yes ▪ Stash in Towers - Yes |
